Thank you to all of those who left such lovely comments about my Teal Top. I have worn it several times now, and it is washing and wearing well, and very comfortable. I am very pleased with it 🙂
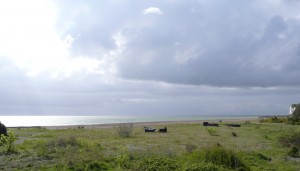
Shortly after my last blog entry we went to east Kent for a little holiday, over my birthday. We had a lovely time, very relaxing, and visited several castles and Roman remains, we are definitely getting our money’s worth out of English Heritage 🙂 This is the view from the bedroom of the cottage we were staying in.
On the knitting front I have been catching up with my homework for the City & Guilds course. I started to get behind in about October, and have been struggling to catch up since. I have now caught up with all my samples (apart from the homework we just got from the class yesterday), and once I have done the latest set of samples I will concentrate on my coursework projects. Hooray!
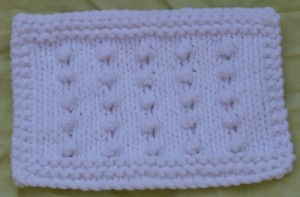
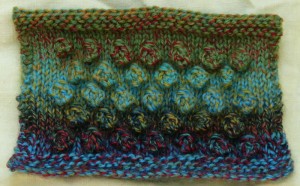
One of the things I love most about the City and Guilds course is the encouragement and opportunity to try things I wouldn’t otherwise have a go at. I am not really a big fan of how bobbles look, I don’t think I would wear anything with bobbles on, though they might be fun on a tea cosy, or an accessory. So without the course it is unlikely I would ever actually knit any. The theme for the homework for the month before last was raised and embossed stitches, and this included bobbles and popcorns (mini bobbles). To my own surprise I actually quite enjoyed knitting them, although they were a little fiddly. They were especially fun in multi-coloured sock yarn.
So here are my popcorns.
And here are some bobbles.
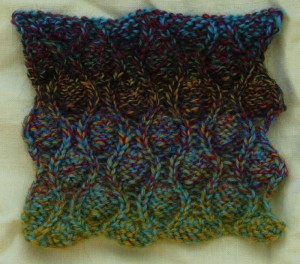
To show a bit of variety for my other raised and embossed patterns here is Cocoon Stitch from Barbara Walker’s A Second Treasury of Knitting Patterns.
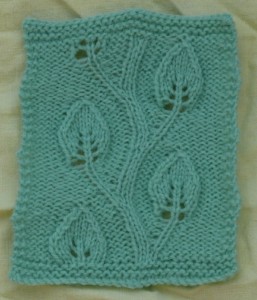
and Embossed Twining Vine Leaf from Nicky Epstein’s Knitting on the Edge: The Essential Collection of Decorative Borders.
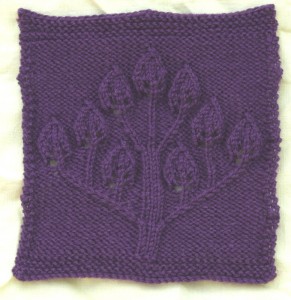
and the beautiful Candle Tree by Barbara Walker available in her A Treasury of Knitting Patterns.
This one is so lovely that I think we all have had to knit one 🙂 Certainly Jo has a lovely picture of her sample on her blog.
Moving on from the raised stitches, the homework for the last class was pockets.
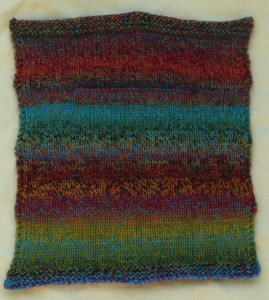
First up we have a bag pocket.
I love the subtlety of this one. You work up until the point of the opening of the pocket, then work a purl turning row on just the pocket stitches. Then work back and forth on just the pocket stitches until your pocket is the size you are after, then fold your pocket up and work across all your stitches again. Afterwards you sew the sides of the bag up, but you don’t sew the bag to the main knitting so that it will hang freely inside your garment – so hopefully wont distort the garment if you put heavy things in the pocket. You do have to be careful that the bag wont hang out the bottom of your garment though!
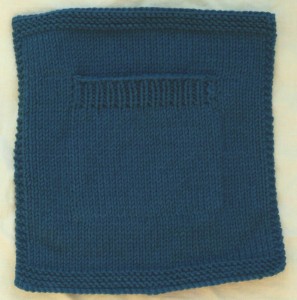
Next is a lined pocket.
For this one you knit the inside of the pocket first, and leave the stitches on a holder. Then knit the garment up to the point where you want the pocket. Put the garment stitches which correspond to the pocket placement on a holder, and as you work across the row, knit the pocket stitches instead. Then carry on up the rest of the garment. Afterwards, come back and knit the rib (or whatever) on the top of the pocket, and then carefully sew the pocket down onto the back of the garment. This one is quite a commonly used pocket and can easily be put into a patterned garment. It is also better for thicker yarns than the bag pocket because you only have one extra layer of fabric.
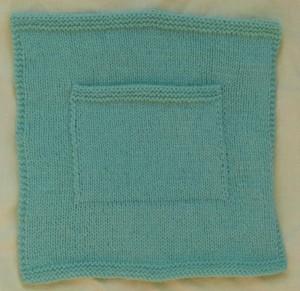
Lastly is the patch pocket.
With this one, you knit the garment first. Then knit the pocket (which can be any shape), then sew the pocket onto the garment. With this sample I actually knitted the pocket onto the sample which I think is probably neater than my sewing. The advantage of this style of pocket is that you can easily make it any shape or size you would like. You also don’t have to think ahead, and can add the pocket as an afterthought. You can try the garment on and experiment with pinning your pocket in different locations to see which you like best. The main disadvantage is that it can interrupt a pattern on the front of the garment, and that you have to sew it down neatly.
If you have got this far you probably deserve a long service medal for reading my rambling 🙂 I’m afraid I don’t have any medals, but I do have someone I would like you to meet.
This is Framboise and she came all the way from France as a birthday present from Paul’s parents. We seem to have gone from winter to summer back to winter again in the last week or so, but Framboise’s bright smile will cheer even the dullest day 🙂

Only you ….
A sensible post on holidays, then knitting samples, every type of pocket possible .. wait .. Oooo Laaa Laaa what’s that ? A wonderful froggie !!!
Thanks for giving me a giggle 🙂
Those all look MOST impressive!
You’ve worked hard on all of theose. I particularly like the trailing vines one.
J’adore the frog and the holiday and knitting both look awesome. Not only that, but I’ve just tagged you (without obligation, natch)for a meme. Do come and see my blog…
Hi Heather
I’ve just read you blog which has cheered me up as I’m going through a really bad patch. I liked Framboise, but where did she get her name! Although it is many years since I studied french and quite a while since I needed to use it, I remembered that Framboise is Raspberry (I did check on Google) and she is green!!!!
All good wishes
Sheila
As I want to make a test (swatch) with the famous “embossed twining vine leaf” … i stop in the second row !!! Can’t understand the difference between stitches in the first and the second… !!
Did you have any trouble with that ?? or my english is not good enough to understand ??? gr gr gr !!! lol
I count on your kindless for an helpfull hand … thanks