Category Archives: Techniques

Eastern crochet

I have just finished reading Knitting in the Old Way: Designs and Techniques from Ethnic Sweaters by Priscilla Gibson-Roberts and Deborah Robson (a very interesting read by the way). The last chapter is on combining crochet with knitting, and they talk about the differences between Eastern and Western crochet. Basically with Western crochet you poke your hook through both legs of the chain of the stitch, whereas with Eastern crochet you only use one leg of the chain. So there are two different kinds of Eastern crochet, the version where you use the front leg of the chain, and the version where you use the back leg. The front leg version is also known as Shepherd’s knitting, and the back leg version is also known as Bosnian crochet. After reading the description of Shepherd’s knitting I was fascinated by how it would come out so I had a go.

I worked a length of chain, joined it into a circle, and then worked a slip stitch into the front leg of each chain as I went round. Carry on until you have had enough.

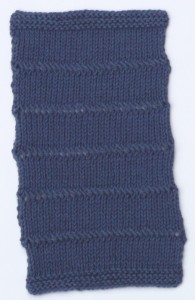
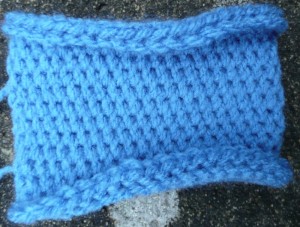
Here is the side which forms away from you as you are working.

easterncrochetfront

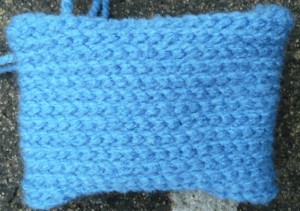
And here is the side which forms towards you as you are working.

easterncrochetback

It looks a lot like knitting, but on its side.

It was quite fun to do, though I am a rather slow crocheter. The finished fabric is not as elastic as knitting, and it does have a bit of a tendancy to bias. I think you could make really interesting things with using bands of this separating sections of knitting. Definitely something to play a bit more with.
Patchwork Knitting Workshop

On Saturday the 4th of October I had the pleasure of helping Jill Brownjohn and Rosie Sykes run a workshop on the Patchwork Knitting of Horst Schulz.

We had 11 participants, a mixture of beginners and those who had been to the workshop Rosie led last year, and the ones Horst taught a few years ago. It was a really nice number, and having three of us doing the teaching meant that we could be running several different things at the same time, giving people a choice of what they would like to try.

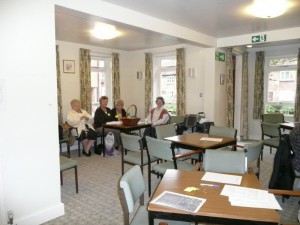
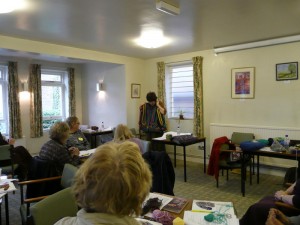
Here are some of the early arrivals before we got started (as with all the other pictures, click to see a bigger version).

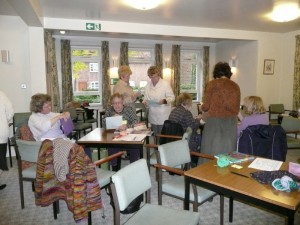
I’m afraid a lot of my photos are a bit on the blurry side, the weather was rather dark and grey outside – a great day for being inside and doing lots of knitting. So here is Rosie talking at the start of the day.

We covered a variety of the modular shapes used by Horst Schulz, and also various of his joining techniques. Jill also talked about combining machine knitting with modular knitting, and I talked about shaping within modules, using the techniques I used in my Patchwork Sweater (I really must come up with a better name for it).

Here is Jill, showing her bag made by machine knitting strips and then joining them using one of Horst’s techniques.

And here Jill is again, talking about a waistcoat she is part way through working.

As well as showing the modular knitting we had been working on, we were fortunate enough to be able to show to everyone some pieces made by the other workshop participants – some of whom are very prolific! This is from Patricia Werner’s Dazzling Knits.

It was wonderful to see the different directions everyone had taken using the same basic ideas. One of the things I love about going to knitting groups and workshops is to see the creativity of all the participants, and to see the fantastic range of things produced when everyone is starting from the same basic starting point. Everyone has different tastes and interests and sees things slightly differently, and it is such a delight to see so many different approaches and what everyone brings to the process.

Here everyone is winding down at the end of the day and just finishing things off in time to pack up.

I had a really great time, and hope that all of the other participants had as much fun as I did. It was wonderful to spend a day with so many enthusiastic and talented knitters. I had such a fantastic time that I was totally exhausted when I got home and slept for 13 hours that night! I am looking forward to the next meet-up and to see what everyone has been making.

On a completely unrelated note, I have become completely addicted to Fantastic Contraption over the weekend. Marvelous for all you armchair engineers 🙂

Out and about

It has been an exciting few weeks on the knitting front here, and I’m afraid I have suffered from the problem that when you are busy doing things the time to write about them just seems to disappear, or I am available but just too tired to make any sense. Anyway, things are a little quieter now (we wont mention the City and Guilds homework that I am still behind on) so I will do a spot of catching up. I am going to try and keep things in the order that they happened, otherwise I will be confused (it doesn’t take much).

I have been composing this post for some time (I told you I was a little slow) and was all ready to tell you all about the progress on my Kool Aid socks. They are becoming quite well travelled, although sometimes they don’t make it out of the bag. However, on Sunday I began to have worries about whether I would have enough yarn, and when I weighed what was left discovered that I had knitted exactly half of my ball. Unfortunately I am only half way down the foot of the first sock. Oh blast!

I haven’t been doing too well with these socks, since they are on their second incarnation already. Oh well, at least it gives me a chance to practice the cast on and a slightly different heel again. The Supercook socks use the same base yarn, but I used 2.5mm needles, and had plenty of yarn left over. I was slightly concerned that as it is quite a fine yarn I would get a more hard-wearing sock if I went down a needle size or two. So I started the Kool Aid socks on 2mm needles – I think that may have been a step too far. This time I think I will try 2.25mm needles. I haven’t actually undone them yet. I was concerned that I would undo them in a fit of pique and then think of something I should have measured which would be useful for the re-knit. I will bite the bullet soon.

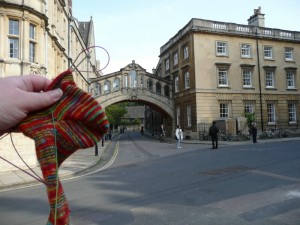
Anyway, here is a picture of the sock disporting itself at the old alma mater before its untimely demise.

On a more chirpy note, my stitch samples for City and Guilds class were all fine, so I am inching my way slightly closer towards finishing. I have been playing with potential button holes, and think I have just about made a decision. Soon I will be on to the even trickier decision of buttons themselves.

On a completely un-related note, The case of the disappearing teaspoons: a longitudinal cohort study of the displacement of teaspoons in an Australian research institute gave me a good chortle today.

Combined stitch structures

Apologies for no post on Monday, and that today’s post is rather later than usual. We have been down to Cornwall for a couple of weeks which was lovely, so the last three posts were brought to you by the magic of post-scheduling. However I haven’t been very quick at getting things sorted out once we got back, although we now have clean clothes which is a good thing.

September’s City and Guilds knitting homework was combined stitch structures. All of my examples come from the 1000 Knitting Patterns Book.

First up stranded knitting and lace, with a few slipped stitches thrown in too.

Next some cables and lace.

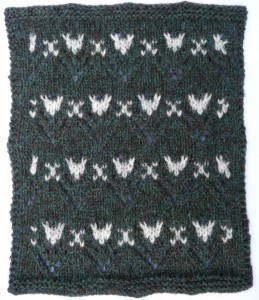
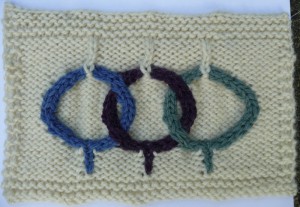
And finally some intarsia, a little bit of stranding and cables. The original pattern for this was in just one colour, and had a mixture of garter stitch and reverse stocking stitch for the background. I changed it to use all reverse stocking stitch and to introduce the colours. The rings are worked in intarsia, but the background is stranded across the back of each ring.

These were the last set of samples to complete the sample portfolio, and I handed in the whole lot (all 5 lever arch files of it!) at the class on Sunday. This is the first piece of work that I have had formally assessed for this course although Fiona has been checking our work as we go along to make sure we haven’t got completely the wrong end of the stick. It is nice to finally hand something in officially though, and I think it will be useful to have a bit of feedback on it all before I am too far along with all the other parts. It is always hard to know exactly what is expected on a new course until you get your first piece of work assessed. I am miles behind on the projects though so I had better go and get a move on with them!

Lace

The homework for our August City and Guilds class was lace.

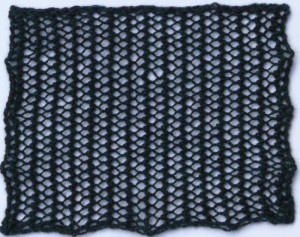
The first sample is an example of faggoting, that is, a lace mesh.

This pattern is called Basic Faggoting Stitch and is from A Treasury of Knitting Patterns by Barbara Walker.

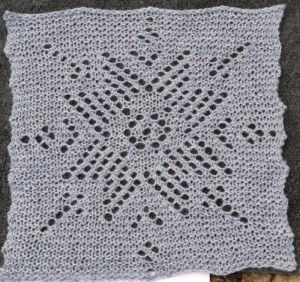
The second sample is an example of a pattern made with eyelets.

This is a snowflake from Gossamer Webs: The History and Techniques of Orenburg Lace Shawls by Galina Khmeleva and Carol R. Noble. There were a couple of little errors in this chart so if you are interested in knitting any of these patterns I would recommend downloading the errata first (although neither of the errors I spotted were actually included in the errata, I have contacted them so hopefully they should appear in the next version of the corrections). In 2000 Mummy and I went on a fascinating weekend workshop in Bradford organised by the Knitting and Crochet Guild on Orenburg shawls. It was really interesting and a wonderful weekend, I am looking forward to getting round to doing my own Orenburg shawl at some point.

Next up is an example of Shetland lace.

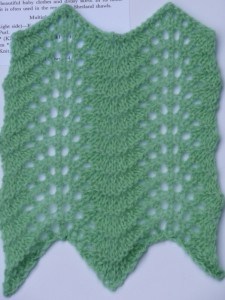
This is Feather and Fan Stitch, I got the instructions from A Treasury of Knitting Patterns by Barbara Walker, but being a traditional pattern it is in a lot of books. This just goes to show that you can work lace in acrylic 🙂

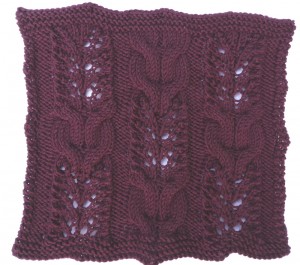
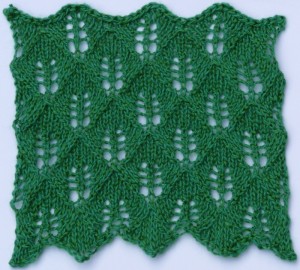
Lastly, my fourth sample shows an example of a more complex lace pattern which distorts the fabric (if the decrease is not right next to the corresponding yarn over then the fabric will be distorted).

This is Fern or Leaf-Pattered Lace, again from A Treasury of Knitting Patterns by Barbara Walker. I do love this pattern, it tiles so beautifully. I must do a whole garment using this, it is such a lovely pattern, and very pleasant to knit.

I now only have one more set of samples to do, on combined stitch structures, and then I need to organise them all and hand them in. I am hoping to be able to hand in at the September class so I’d better get a move on!

Workshop on the Patchwork Knitting Techniques of Horst Schulz

I am very excited to announce that I will be helping Rosie Sykes and Jill Brownjohn to run a workshop on Horst Schulz‘s Patchwork Knitting Techniques in October. So the salient details:

When?

Saturday 4th October 2008, 9.30 – 5.00

Where?

Liston Hall, Marlow, Buckinghamshire, UK.

How much does it cost?

£35

What will I learn?

Rosie and Jill will cover the basics of mitred squares and joining them together, knitting strips and different joining methods, chevrons, shells, and combining these techniques with machine knitting. I will cover shaping within mitred squares, the methods I used when making my Patchwork Sweater. We we also all be talking about design ideas for what you can do with all these techniques.

How do I find out more / book my place?

Contact Jill Brownjohn for more information and a booking form at telephone 01628 471397. Unfortunately Jill’s email isn’t working at the moment, but you can email me for the booking form at heather@heatherknits.com.

Hope to see you there!

Japanese knitting books

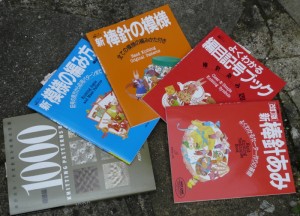
A parcel arrived a little while ago containing some books I had ordered from Amazon in Japan.

They are all in Japanese, but have fantastically clear diagrams. I get the impression that I would probably learn even more if I actually could understand the Japanese, but the diagrams are numerous and well thought out enough that one can learn a lot just from looking at the pictures.

First, on the right is the Hand Knitting Techniques Book, which is really pretty self-explanatory. There are 80 pages, and it takes you right from how to form a knit stitch and a purl stitch, through casting on and off, decreases, increases and several fancier textured stitches. A lot of the techniques I already have descriptions of in other books, but I do find the diagrams in this book to be exceptionally clear. Also they really do illustrate every step of a stitch, with lines drawn on to show exactly where your needle or yarn should be going. There are also a few techniques, particularly some of the textured stitches that I haven’t come across in other sources. I found the approach to the cast ons very interesting. Although they only really demonstrate the tubular cast on and the long tail cast on there are lots of different variations, and how to work them in particular circumstances which I am looking forward to experimenting with.

Next is Clear & Simple Knitting Symbols. One of the nice thing about Japanese knitting patterns is that they have a standard set of symbols which every pattern uses. This book is basically a key for those symbols, along with diagrams of how to do them. There are 74 pages, and while it does cover casting on and off it is a lot briefer on the subject than Hand Knitting Techniques Book. It does show a knitted sample for lots of different stitches, along with the Japanese chart symbol for the stitch, and instructions on how to do it.

The last three are stitch dictionaries, Hand Knitting Original Patterns, Knitting Signs and Make Patterns, and 1000 Knitting Patterns Book. The 1000 Knitting Patterns Book also contains crochet. Inevitably there is some overlap between these books and ones I already own, but there are also some stitches in these that I haven’t seen before. Particularly interesting are the combined stitches, so fair isle and lace, or cables and lace. Also some interesting textures created by variations on knitting into the stitch of the row below, or of several rows below.

The postage from Japan is quite expensive, I imagine because books are quite heavy. All in all though I think these are a good addition to the knitting library. There are several stitch patterns I have earmarked already to have a play with, and I am also keen to experiment with the different variations on the tubular cast on, and on ways to close the gap on stocking stitch short rows.

Distortion

Our homework for the July City and Guilds class was on stitches which distort the fabric, slits, slots, dropped stitches and elongated stitches.

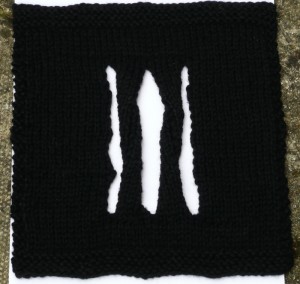
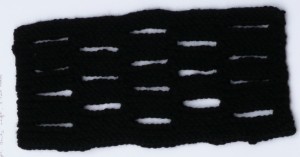
My first two samples are in black, which unfortunately didn’t photograph very well. The first shows vertical slits in the fabric. Each section is knitted separately and then they are all united in the row that joins the slits. I gave each of the interior sections a one-revolution twist, one in each direction, before the join.

The second sample is of horizontal slots in the fabric. These are made like large horizontal button holes.

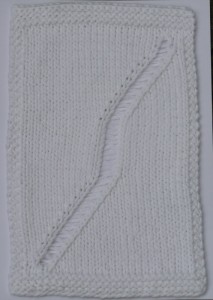
Then we moved on to dropped stitches (intentionally that is). The extent of the dropped stitch is controlled with a yarn over. The yarn over is worked at the point you would like the dropped stitch to stop unravelling. I like to mark the stitch I am going to drop with a safety pin so I can keep track of it as I am knitting. You can make it travel across the knitting using balanced increases and decreases, make a decrease on the side of the marked stitch that you would like it to bend towards, then make a corresponding increase on the other side so that the total number of stitches remains the same. For this sample I only used one dropped stitch. Since the stitch is wider once it has been dropped, I made two decreases at the start of the dropped section, one on either side of the yarn over. Then made two corresponding increases once I had dropped the stitch at the top of the section.

Next onto more elaborate patterns. These are all from Barbara Walker’s A Treasury of Knitting Patterns.

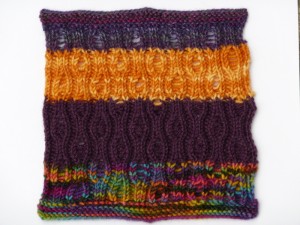
First Vertical Drop Stitch:

It was interesting to see how this looked with different yarns. They are all wool, apart from the top purple which is 75% wool, 25% nylon. I think this pattern actually looks quite good in the yarn with a slight variation of colour, but the very multicoloured yarn at the bottom is too much and obscures the pattern.

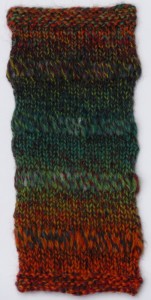
Next elongated stitches. Elongated stitches are created by wrapping the yarn more than once around the needles when a stitch is created, then dropping these extra wraps on the next row. First Simple Elongated Stitch:

Then the slightly more complicated, Twisted Elongated Stitch:

They were all fun to do, though I am not sure whether I would incorporate the slits or slots into a garment. They might be fun if you wove ribbon through them. I find the change in texture interesting when you have a line of elongated stitches or dropped stitches and I’m sure you could create something which used that to good advantage

Knitting with colour

Our homework for the June City and Guilds class was knitting with colour; stranding, weaving in, and intarsia.

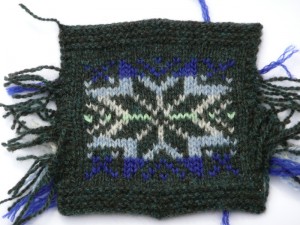
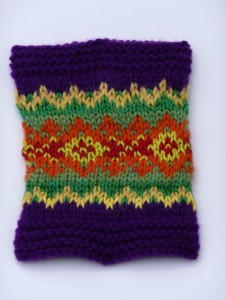
My first sample was an example of stranding:

I did this one by knitting flat, then at the end of each row, snipping the yarn and, after zooming the stitches along to the other end of the circular needle, re-joining the yarn so that I could knit the next row, rather than purling back. The pattern is a traditional one, sometimes called Norwegian star I think. The yarns are all 4ply weight Shetland, apart from the darker blue which is an oddment and I think is probably acrylic, I’m not sure where it came from actually. I enjoyed knitting the pattern but didn’t enjoy the fact that this method meant it was hard to get the first and last stitches of each row neat and not sloppy. In light of this I worked all my other stranded samples circularly. It may be bizarre but I would rather do twice as much knitting and have it neat 🙂

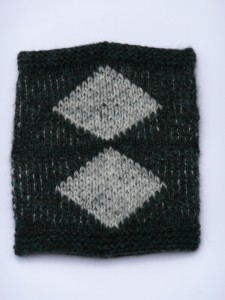
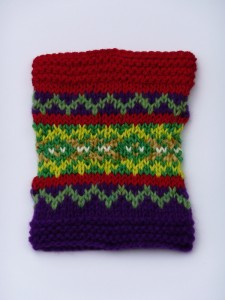
With the stranding the yarn is just held loosely at the back of the work when it isn’t being knitted. Our next sample was weaving in, where the non-working yarn is woven into the working yarn every other stitch in the same way that you would weave in yarn ends.

As you can see, the yarn being woven tends to show through to the right side. This is particularly obvious if, like I have, you have used yarns which contrast a lot in lightness and darkness. This does allow you to make large blocks of one colour while still knitting in the round with relative ease.

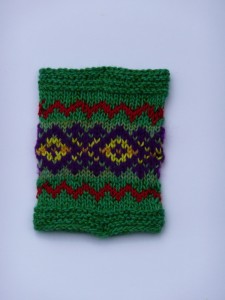
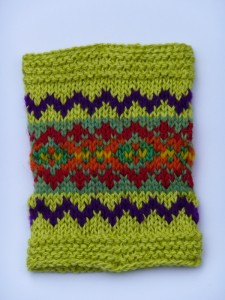
Next up, Fiona gave us a traditional pattern, and using the same selection of colours inspired from a picture, we had to colour in the pattern in a variety of different ways. My picture is of tulip fields in Holland 🙂

It really shows how a pattern can look different depending on the contrast between the background and the foreground. Value contrast really makes a difference. It is one of the problems I found with a couple of my samples, that I had put orange against green, and although they are very different colours, the particular shades I had chosen were very close in value. So if you photocopied them in black and white they would come out the same shade of grey. This means that particularly from a distance the pattern is not clear, and just looks rather blurry.

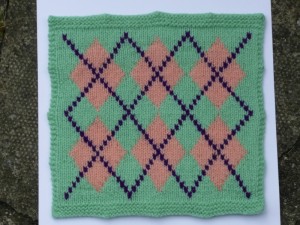
Lastly we did a couple of samples of intarsia. The first geometric, so I used an argyle pattern.

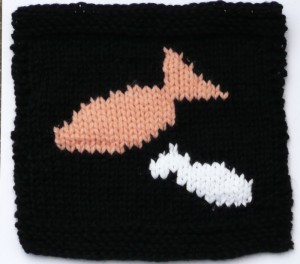
The second pictorial.

They are supposed to be fish.

These were all very enjoyable to do, it has been a long time since I did any intarsia and apart from tangling the yarns a bit it was all good fun. I am definitely going to do some colour work for my second project for the City and Guilds – I just need to get a move on with the first one! Speaking of which, I don’t think I have mentioned this on the blog yet. I will take some pictures as it already has most of a body and one sleeve.