Category Archives: Techniques

Surface Embellishment

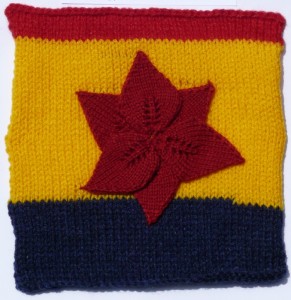
Last months knitting homework for City and Guilds class was on surface embellishment, mostly things added to a plain piece of knitting, but some were knitted in. I had had a go at some of the techniques before, but some were new, so a nice mixture of old friends and new excitement!

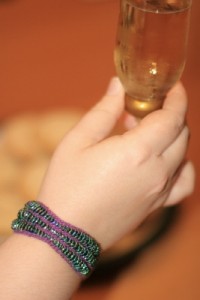
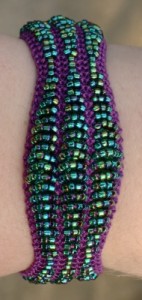
The first old friend was the method of knitting with beads that I used on my bracelets. Here the beads are placed between knit stitches, and the piece is totally reversible.

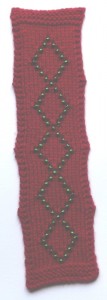
Next, a different method of adding beads into the knitting. This time the knitting is stocking stitch, and the bead lies on the working thread in front of a slip stitch. The pattern is only on one side of the fabric, and this method seems to work best if the bead is a similar kind of size to the knitted stitch. I actually have a dress that I am knitting using this method. I have been knitting it for the last 8 years (ok it has spent a lot of that time in a bag). One of these days I will discover which bag it is in and dig it out and continue.

The last sample using beads involved sewing the beads onto an already finished piece of knitting. I was less keen on this sample. I think it looks a bit messy, partly due to the beads I used being rather inconsistent, and partly due to my not sewing them on very neatly. Not sure I will be doing a lot of bead embroidery in my future.

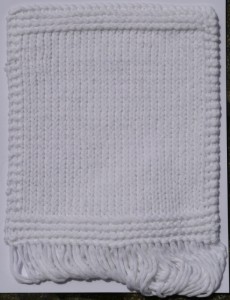
The next bit of embellishment was fringe. I’m afraid my example isn’t wildly exciting.

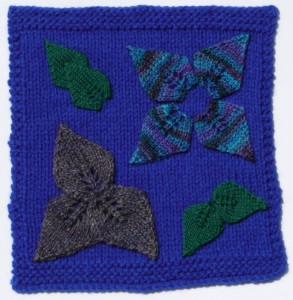
And then onto appliqué. I got a bit carried away with this one 🙂 So many little leaves, so much fun, so many colours. I particularly liked the sock yarn ones.

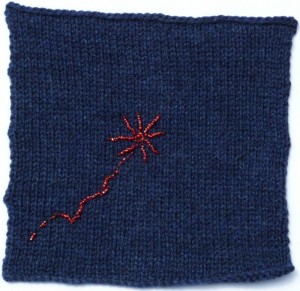
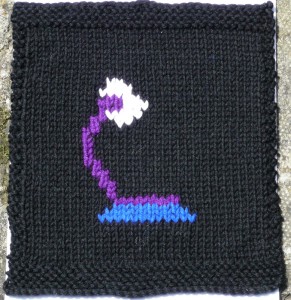
Then a bit of Swiss darning (also known as duplicate stitch). My example is a little abstract, though I do think it looks a bit like an angle-poise lamp (totally unintentionally).

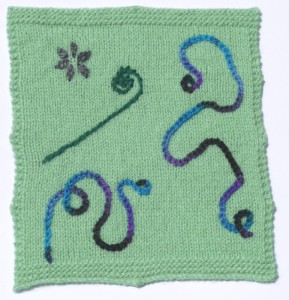
Finally, an example of embroidery. Despite my rather strained relationship with sewing I enjoyed doing this one, and I particularly liked the effect created by space-dyed yarn.

Now I had better get cracking on this months homework. Only just over a week til the next class.

Catching up

Thank you to all of those who left such lovely comments about my Teal Top. I have worn it several times now, and it is washing and wearing well, and very comfortable. I am very pleased with it 🙂

Shortly after my last blog entry we went to east Kent for a little holiday, over my birthday. We had a lovely time, very relaxing, and visited several castles and Roman remains, we are definitely getting our money’s worth out of English Heritage 🙂 This is the view from the bedroom of the cottage we were staying in.

On the knitting front I have been catching up with my homework for the City & Guilds course. I started to get behind in about October, and have been struggling to catch up since. I have now caught up with all my samples (apart from the homework we just got from the class yesterday), and once I have done the latest set of samples I will concentrate on my coursework projects. Hooray!

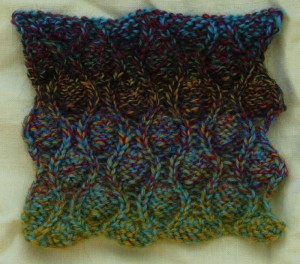
One of the things I love most about the City and Guilds course is the encouragement and opportunity to try things I wouldn’t otherwise have a go at. I am not really a big fan of how bobbles look, I don’t think I would wear anything with bobbles on, though they might be fun on a tea cosy, or an accessory. So without the course it is unlikely I would ever actually knit any. The theme for the homework for the month before last was raised and embossed stitches, and this included bobbles and popcorns (mini bobbles). To my own surprise I actually quite enjoyed knitting them, although they were a little fiddly. They were especially fun in multi-coloured sock yarn.

So here are my popcorns.
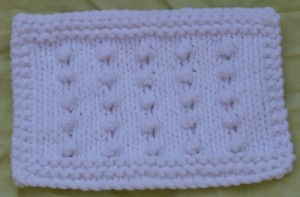
And here are some bobbles.
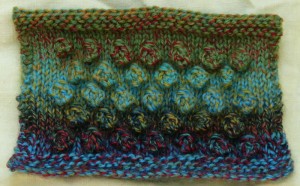
To show a bit of variety for my other raised and embossed patterns here is Cocoon Stitch from Barbara Walker’s A Second Treasury of Knitting Patterns.

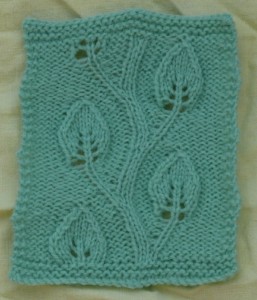
and Embossed Twining Vine Leaf from Nicky Epstein’s Knitting on the Edge: The Essential Collection of Decorative Borders.

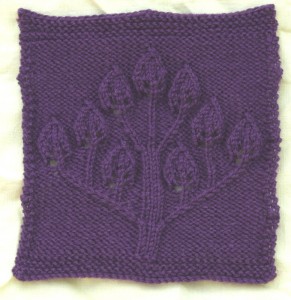
and the beautiful Candle Tree by Barbara Walker available in her A Treasury of Knitting Patterns.

This one is so lovely that I think we all have had to knit one 🙂 Certainly Jo has a lovely picture of her sample on her blog.

Moving on from the raised stitches, the homework for the last class was pockets.

First up we have a bag pocket.
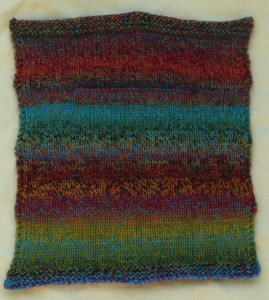
I love the subtlety of this one. You work up until the point of the opening of the pocket, then work a purl turning row on just the pocket stitches. Then work back and forth on just the pocket stitches until your pocket is the size you are after, then fold your pocket up and work across all your stitches again. Afterwards you sew the sides of the bag up, but you don’t sew the bag to the main knitting so that it will hang freely inside your garment – so hopefully wont distort the garment if you put heavy things in the pocket. You do have to be careful that the bag wont hang out the bottom of your garment though!

Next is a lined pocket.
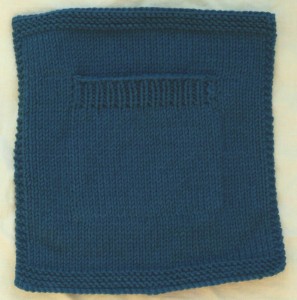
For this one you knit the inside of the pocket first, and leave the stitches on a holder. Then knit the garment up to the point where you want the pocket. Put the garment stitches which correspond to the pocket placement on a holder, and as you work across the row, knit the pocket stitches instead. Then carry on up the rest of the garment. Afterwards, come back and knit the rib (or whatever) on the top of the pocket, and then carefully sew the pocket down onto the back of the garment. This one is quite a commonly used pocket and can easily be put into a patterned garment. It is also better for thicker yarns than the bag pocket because you only have one extra layer of fabric.

Lastly is the patch pocket.
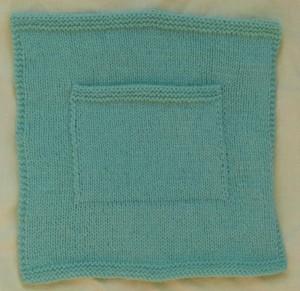
With this one, you knit the garment first. Then knit the pocket (which can be any shape), then sew the pocket onto the garment. With this sample I actually knitted the pocket onto the sample which I think is probably neater than my sewing. The advantage of this style of pocket is that you can easily make it any shape or size you would like. You also don’t have to think ahead, and can add the pocket as an afterthought. You can try the garment on and experiment with pinning your pocket in different locations to see which you like best. The main disadvantage is that it can interrupt a pattern on the front of the garment, and that you have to sew it down neatly.

If you have got this far you probably deserve a long service medal for reading my rambling 🙂 I’m afraid I don’t have any medals, but I do have someone I would like you to meet.

This is Framboise and she came all the way from France as a birthday present from Paul’s parents. We seem to have gone from winter to summer back to winter again in the last week or so, but Framboise’s bright smile will cheer even the dullest day 🙂
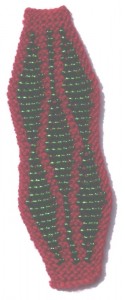
Emerald Beaded Bracelet Pattern

This pattern was originally published in the March 2007 edition of MagKnits.

This easy and fun bracelet is quick to knit up in an evening or two. It would make a great last minute surprise gift for a friend, or make one to go with each of your outfits for parties.
I love knitting with teeny little needles and fine thread, and experimenting with the different shapes you can create by adding beads to basic garter stitch. The beads are all prestrung before the knitting starts, and all rows are knitted, with the same number of stitches in each row. The shaping is produced by varying the number of beads in a row. This bracelet makes a great introduction to the fun that is knitting with beads.

Skills needed

· Cast on

· Cast off (bind off)

· Knit

· Place a bead between knit stitches (instructions included in pattern)

Materials

· 1 x 10g (82m / 91 yds) ball Anchor Pearl Cotton No. 8 (also called Coton Perlé) in colour 100 (purple) (One 10g ball will make several bracelets)

· 1314 (approx. 15g) x size 11 seed beads in colour silver lined emerald rainbow

· Two 1.25mm (US Size 0000) knitting needles

· 9mm (3/8 in) press-stud (snap fastener)

· 1 beading needle and length of sewing thread to aid threading of beads

· Tapestry needle

Yarn substitutions

Any other crochet cotton of a similar thickness would be appropriate. A non-stretchy yarn works best for this design since otherwise the weight of the beads would distort the bracelet.

Finished size

The finished bracelet measures 17cm (6.75 in) long, and is 3cm (1.25 in) wide at the widest point.

Tension (gauge)

Approximately 60 stitches and 120 rows to 10cm (4 in) in garter stitch (knit every row) without beads using 1.25mm needles.

The tension (gauge) for this pattern is not critical since plain knit rows can easily be added in. Add more rows immediately after the cast on before the pattern begins, and add a similar number of rows immediately before the cast off. If the bracelet is coming out too long, simply omit 2 rows (or 4 if it is going to be really long) from each section of the pattern.

This pattern is available free as an electronic file in PDF format. File size is 754 KB. The pattern has 5 pages.

Download pattern now (This is a link to Ravelry but you don’t need to be a member to download the pattern)

Copyright Notice

All rights reserved. This pattern is for personal use only. This pattern, items made from this pattern or any portion of pattern or item may not be resold, or otherwise used for profit without express permission from the designer. This pattern may also not be distributed for free by any individual or shop without permission.

Three Deep Waves Beaded Bracelet Pattern

This opulent beaded bracelet, based on garter stitch (knit every row), is quick and easy to work up, and an excellent introduction to knitting with beads. The beads added on every row give a three-dimensional quality to the piece, and the weight of the beads give the bracelet a great drape. The shape of the bracelet is created by varying the number of beads on each row. The beads themselves lie between the stitches so the number of knitted stitches remains constant on each row, eliminating the need for shaping within the knitted fabric.

Skills needed

  • Cast on
  • Cast off (bind off)
  • Knit
  • Place a bead between knit stitches (instructions included in pattern)

Materials

  • 1 x 10g (82m / 91 yds) ball Anchor Pearl Cotton No. 8 (also called Coton Perlé) in green (One 10g ball will make several bracelets)
  • 1740 (approx. 18g) x size 11 seed beads in green
  • Two 1.25mm (US Size 0000) knitting needles
  • 1 x 9mm (0.4 inch) press-stud (snap fastener)
  • Sewing needle and thread of a similar colour to your knitting cotton
  • Beading needle and length of sewing thread to aid threading of beads

Yarn substitutions

Any other crochet cotton of a similar thickness would be appropriate. A non-stretchy yarn works best for this design since otherwise the weight of the beads would distort the bracelet.

Finished size

The finished bracelet measures 17cm (6.75 inches) long, is 3.75cm (1.5 inches) wide at the widest point, and 2cm (0.75 inches) wide at the narrowest point.

Tension (gauge)

Approximately 7 stitches and 10 rows to 1cm in garter stitch (knit every row) using 1.25mm needles. The tension (gauge) for this pattern is not critical since plain knit rows can easily be added in. Add more rows immediately after the cast on before the pattern begins, and add a similar number of rows immediately before the cast off. If the bracelet is coming out too long, simply omit 2 rows (or 4 if it is going to be really long) from each section of the pattern.

This pattern is sold as an electronic file in PDF format. File size is 264 KB. The pattern has 5 pages. Once payment is received a link to a personalised website will be emailed to you for you to download your copy of the pattern. Please note this link will expire.

Price: £2.00 (This button will take you to a Ravelry page where you can buy the pattern, but you don’t need to be a Ravelry member for it to work)

Three Deep Waves Beaded Bracelet

Copyright Notice

All rights reserved. This pattern is for personal use only. This pattern, items made from this pattern or any portion of pattern or item may not be resold, or otherwise used for profit without express permission from the designer. This pattern may also not be distributed for free by any individual or shop without permission.

Basic Beaded Bracelet Pattern

Basic Beaded Bracelet

This simple beaded bracelet, based on garter stitch (knit every row), is quick and easy to work up, and an excellent introduction to knitting with beads. The beads added on every row give a three-dimensional quality to the piece.

Basic Beaded Bracelet Fastening

Skills needed

  • Cast on
  • Cast off (bind off)
  • Knit
  • Place a bead between knit stitches (instructions included in pattern)

Materials

  • 1 x 10g (82m / 91 yds) ball Anchor Pearl Cotton No. 8 (also called Coton Perlé) in brown (One 10g ball will make several bracelets)
  • 660 (approx. 8g) x size 11 seed beads in gold
  • Two 1.25mm (US Size 0000) knitting needles
  • A 1.25mm crochet hook (the size of crochet hook isn’t critical, although it is handy if it is a similar size to your knitting needles)
  • One small button
  • 1 beading needle and length of sewing thread to aid threading of beads

Yarn substitutions

Any other crochet cotton of a similar thickness would be appropriate. A non-stretchy yarn works best for this design since otherwise the weight of the beads would distort the bracelet.

Finished size

The finished bracelet measures 18cm long, not including the button or loop, and is 2cm wide at the widest point.

Tension (gauge)

Approximately 7 stitches and 10 rows to 1cm in garter stitch (knit every row) using 1.25mm needles.

The tension (gauge) for this pattern is not critical since plain knit rows can easily be added in. Add more rows immediately after the cast on before the pattern begins, and add a similar number of rows immediately before the cast off. If the bracelet is coming out too long, simply omit 2 rows (or 4 if it is going to be really long) from each section of the pattern.

Basic Beaded Bracelet Flat

This pattern is sold as an electronic file in PDF format. File size is 232 KB. The pattern has 4 pages. Once payment is received a link to a personalised website will be emailed to you for you to download your copy of the pattern. Please note this link will expire.

Price: £2.00 (This button will take you to a Ravelry page where you can buy the pattern, but you don’t need to be a Ravelry member for it to work)

Copyright Notice

All rights reserved. This pattern is for personal use only. This pattern, items made from this pattern or any portion of pattern or item may not be resold, or otherwise used for profit without express permission from the designer. This pattern may also not be distributed for free by any individual or shop without permission.

Half a hat

I was hoping to post this on Saturday but my computer has been having a bit of a moment. After spending an extended time-out on the naughty step contemplating the error of its ways, and having its hard disk defragmented 4 times (which took 2 days!) it is now a behaving itself a bit better.

In the time not spent at the computer I have been knitting a bit more on the hat:

I have worked the first crown:
I have picked up my stitches from my provisional cast on, and started on the second half, in inverse colours:


P is convinced it is a hat for Marge Simpson, I keep telling him he needs to wait and see …

It’s arrived!

I caved and finally ordered some of the Kauni yarn everyone has been going on about. It is such fantastic colours I couldn’t resist, and it arrived on Saturday! I had been hoping that the weather would perk up a bit so I could take pictures outside, but it hasn’t so I’m afraid we have inside pictures today:

Surprisingly (!?) I ordered the brightest colour they had (EQ), and while I was at it a couple of balls of Trekking found its way into my shopping basket too. It was the first time I have ordered from Astrid’s Dutch Obsessions and the process all went very smoothly and quickly, and she even included a little piece of cake! (just visible on the right of the picture above). I have been very restrained and haven’t casted on yet, I am still plotting what exactly I am going to do. The yarn is very nice and I love the long stretches of colour. My only niggle is that it isn’t the softest yarn in the world. I think it will be ok, it is not that harsh, but I would love to find something in colours like this but perhaps in merino. If you have come across anything I would love to know about it!

Stranded hat

The hat is trotting along, I have started the decreases for the crown (and changed my mind, undid about 20 rows and redid them), here you see version 2 (version 1 didn’t live long enough to have its photo taken):


My hands are definitely getting more used to knitting together, although I am still haven’t some difficulties with pulling the yarn in the left hand too tight, anyone have any suggestions?

Comments

The Japanese short rows aren’t too much of a pain once you get going. Also, while the pins are handy while you are starting out because they make it completely clear exactly which thread you need to pick up, I think you can dispense with them once you have got the idea. Once you have got rid of the pins it it probably less fiddly even than the wrapping method. I am going to do some more experimenting so watch this space!

Japanese short rows

The two-colour hat is jogging along. It now looks much the same as before but slightly longer so I have spared you an update photograph. Instead I will share something else I have been working on.

I found a great tutorial on Japanese short rows and have been doing a bit of experimenting on my latest pair of socks. I found all the safety pins a bit cumbersome but very helpful for a beginner. I’m sure that once I have practiced a few times I wont need them anymore, but it is nice to be able to clearly see which loop needs to be picked up.


I definitely think I am getting a more even result than I normally do with wrapped short rows. With wrapped short rows one side of the heel seems to be fine, but the other side is a bit sloppy. I might have a go at the yarn over short rows as well, just to compare, but so far I really like the Japanese method. I am looking forward to trying it out on something other than socks too.

The yarn I am using is Blue Moon Fiber Arts, Socks That Rock Lightweight (100% merino) in colour Sunstone. It is a really nice yarn to knit with, very soft and comfortable. Their website is very dangerous, in the process of looking looking up those links I have found two new colourways I am keen on – oh dear.

Also the new Interweave Knits and Vogue Knitting magazines arrived this morning, so I am going to enjoy reading them while I eat my lunch.

Terribly British

In celebration of all the good weather here we have been out decimating the garden this weekend. We had a large goat willow near our boundary with next door which was starting to lean on their greenhouse so on Friday a couple of tree surgeons came and removed it, and gave the Eucalyptus and the smoke bush a bit of a hair cut too.

This was the view from our back door on Thursday before all the action:

and here is the view this lunchtime:

The tree surgeons were very quick and tidy, although it was rather hair-raising watching them climbing the trees with chain-saw in hand! P has also been hard at work at the weekend chopping down and pulling up some of the other rather over-grown stuff, and is now onto renovating the lawn which is currently partly bald, and partly brown and crispy.

After all the excitement we decided it was time to actually enjoy the garden and so on Saturday night went shopping for some food to cook on the barbecue for Sunday lunch. Sunday dawned rather grey, but neither of us are particularly good at letting go of an idea once we have latched onto it, so we bravely forged ahead, got the barbecue out, lit it, and put the food on. Then the rain started:


There is something so terribly British about barbecuing in the rain, so many happy childhood memories of summer holidays with iffy weather 🙂 It is all part of the fun really. Luckily it stopped raining and the sun came out just as the food was cooked and we had a lovely meal, beef burgers with onion and chilli made by P in rosemary rolls made by me, very yummy. We finished it all off with a trip to RHS Wisley to enjoy someone elses garden.

Knitting

In amongst all the gardening I have been doing a bit of knitting:

I am practising my two-handed two colour stranded knitting. I have just about beaten my left hand into submission now and am starting to get a bit faster and more even. I thought this would be a good practice project before I launch into Alice Stamore’s Henry VIII. It is going to be a double layer reversible hat, but requires a bit of imagination at the moment.

Comments

Thank you all for your very kind comments on the Patchwork Sweater. I will definitely look into writing the pattern up, though it may take me a while to work out the logistics of making it fit a wide variety of sizes!